1. Introduction
1.1. Carol environment: how to get started
On your first access to the Carol environment you will be presented to the screen on Figure 1. On the picture there are several elements to be noticed.
A: The URL is composed by the
organization level idfollowed by.carol.ai, then appended with theenvironment id. The working environment will also be shown on B.C: The left panel shows the different components available on Carol. On this tutorial we will be be focusing mostly on
Connectors,Data ModelsandCarol Apps.D: On this pop-up you have the user and environment admin configurations. Through this dropdown you can, for example, revise access tokens defined on the environment. This topic is covered later on this document.
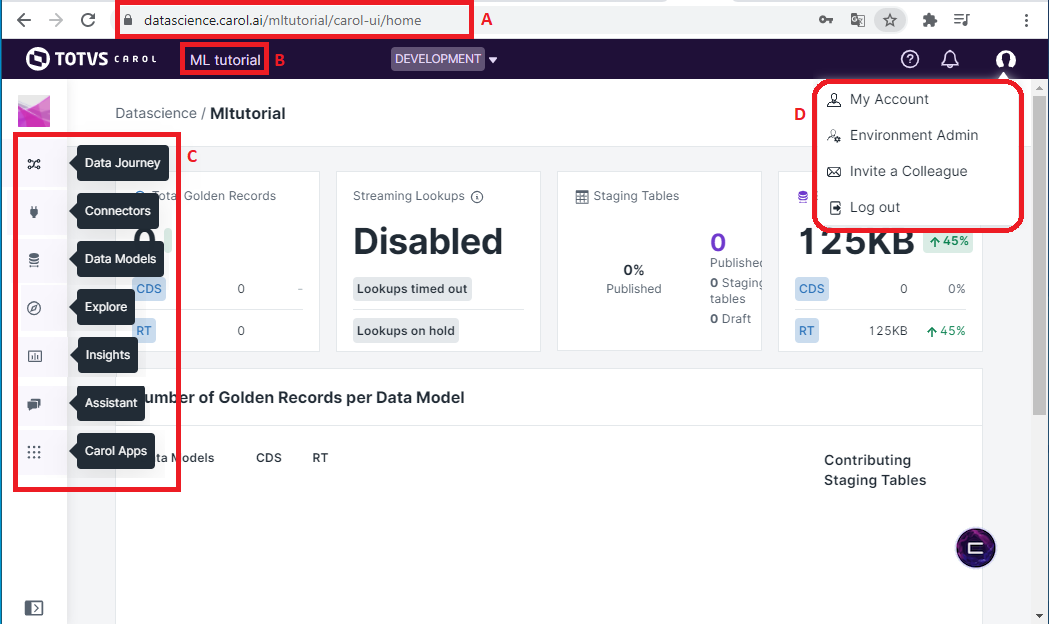
Figure 1: Welcome screen on Carol
Further material on each of the individual components can be found on the official documentation: https://docs.carol.ai/docs.
1.2. Creating a connector to store your data
Even though it is not mandatory, it is a good practice to load your dataset into the Carol Platform. Once on carol, the data can be easily integrated, transformed, validated and consumed by your Carol Apps.
Carol organizes its datasets in connectors. Connectors can be viewed as a parallel for databases on conventional SGBDs, or as sheets on spreadsheets softwares. Inside the connectors you can store data in one or more stagings, where the actual tabular data will reside. These components are further described on https://docs.carol.ai/docs.
To create a new connector click on the Connectors icon on the left
panel, then on All option, and then on the Add a Connector
button (see figure 2).
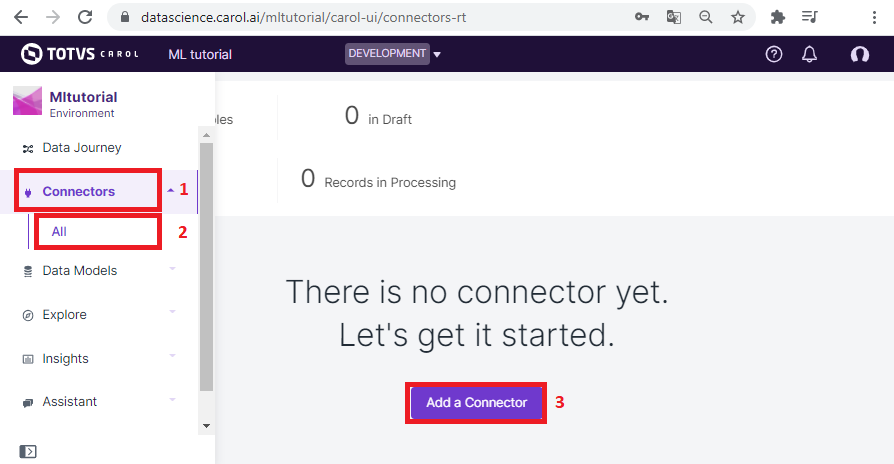
Figure 2: Openning the create connector wizard.
The platform will conduct you through a wizard process, where you first need to set the name of your project (figure 3).
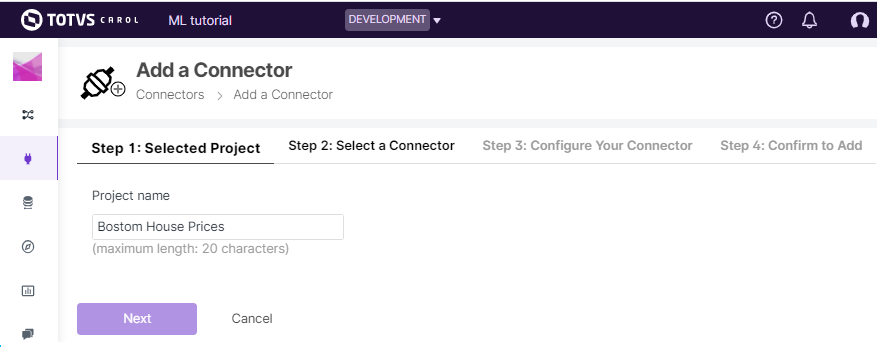
Figure 3: Choosing a name for your project
The following step is to choose which technology will be used to fetch
your data from the source systems. There are several connector types
available for your choice, and even new ones can be configured depending
on the project. For this simple exercise we will manage the data
ingestion through external code, using the PyCarol python library.
Therefore we can proceed by selecting the Custom connector type
(figure 4).
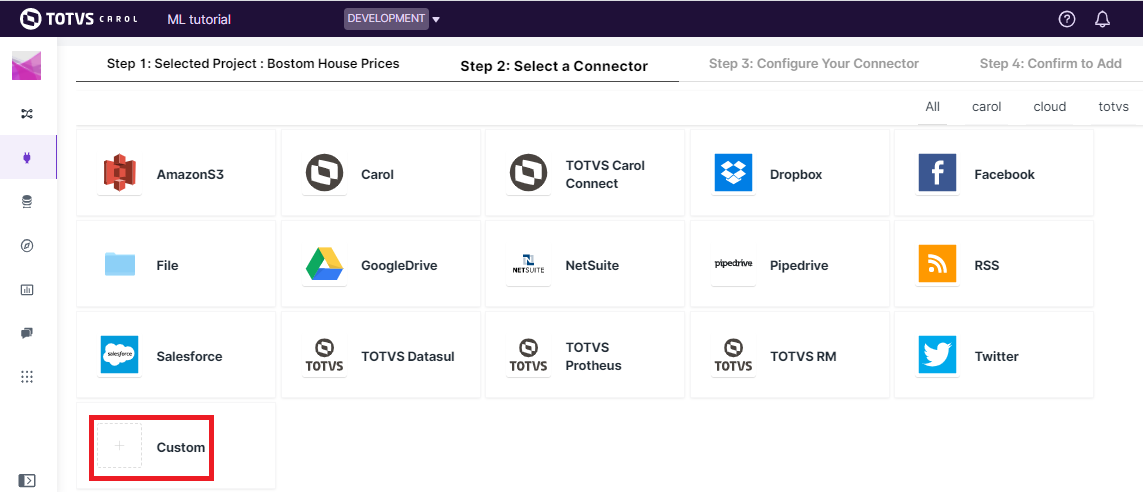
Figure 4: All connector types available on Carol platform to the moment.
The following two steps you need to set a label for your connector (figure 5) and then confirm its creation (figure 6). It is a good practice to avoid spaces when setting the connector name, which can be accomplished by using snake case (ex.: Bostom_House_Prices) or pascal case (ex.: BostomHousePrices) names.
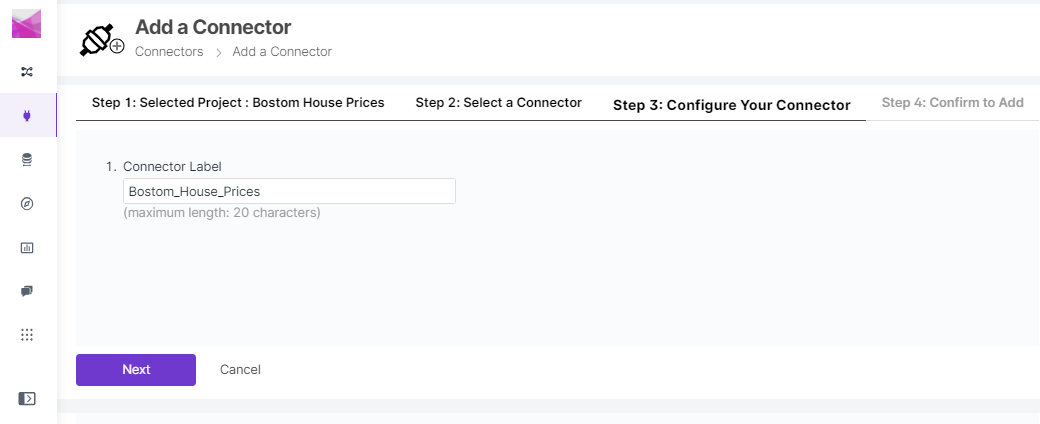
Figure 5: Naming your connector.
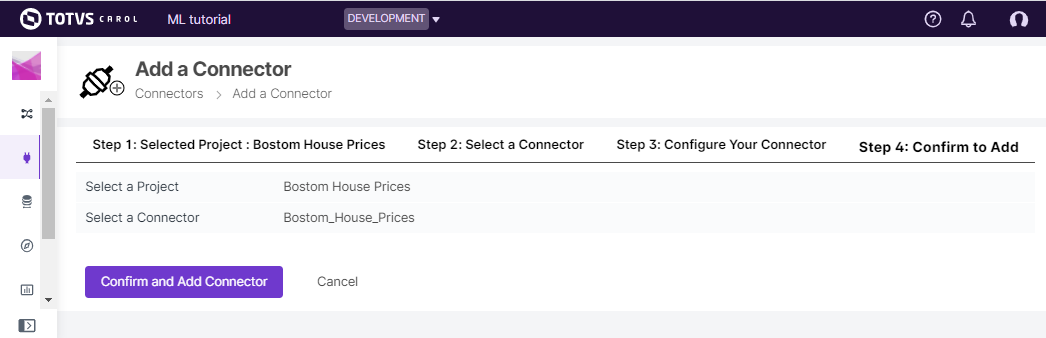
Figure 6: Confirming the creation of your new connector.
Now your connector has been created and it is ready to receive data. If your data is complex enough, it may be worth spliting on different connectors or stagings and joined together later through a data model. In general tables from the same data source should be stored under the same connector but in different stagings. When handling multiple data sources different connectors should be used.
1.3. Generating an access token
For most of the steps on the tutorial we will be accessing the Carol environment not through the GUI, but through scripts and code. In order to be able to do so we first need to create an access token to the environment. The access token sets the security level to asure only authorized applications can interact with your environment and data.
On the user / environment configurations dropdown, on the top right,
click on Environment Admin. Now select the Tokens sheet and the
click on the Create token button. The steps are ilustrated on figure
7.
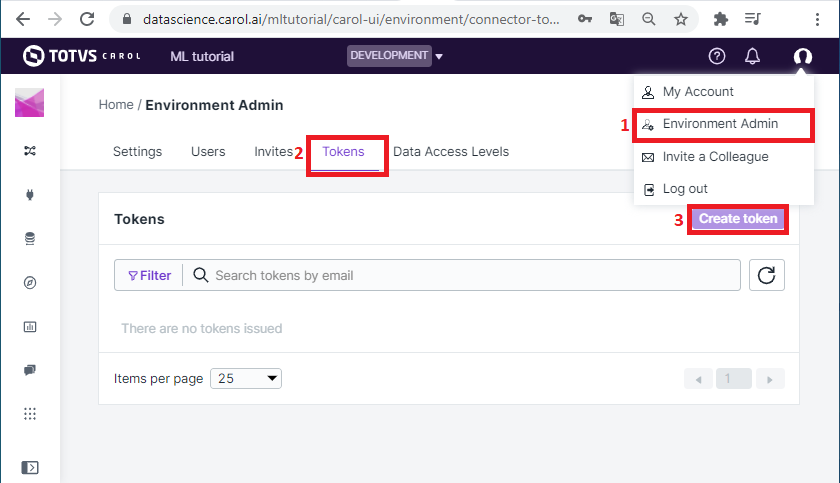
Figure 7: Sequence of steps to create a new token.
It is enough for you to select a connector and give a brief description
of the purpose for the access token. After clicking on Generate you will
be presented with the connector id and the access token strings
(figure 8). Take note of these values, the Connector Id can still be
viewed after you click on Done, but the access Token won’t be
available anymore.
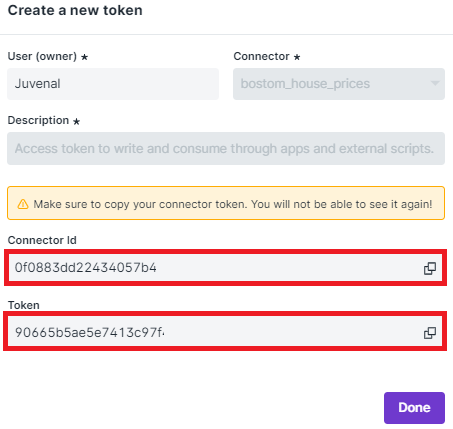
Figure 8: Revising the generated token.
If for any reason the access Token is lost, it is recommended to
revoke and create a new one in sequence.
1.4. Creating your first Carol App
Carol Apps gives you the flexibility to implement different types of applications to interact with your data, providing useful solutions for your business. When we create an app inside Carol, the platform will create all the necessary backend in order to be able to run your code.
To create an app, it doesn’t matter if it is an online, batch or web app
for now, go to the Carol Apps icon on the left panel, then select
Developed Apps and then click on Create a new App (see figure
9). You might not have the Developed Apps option available yet, in
that case contact you administrator and ask for the permission.
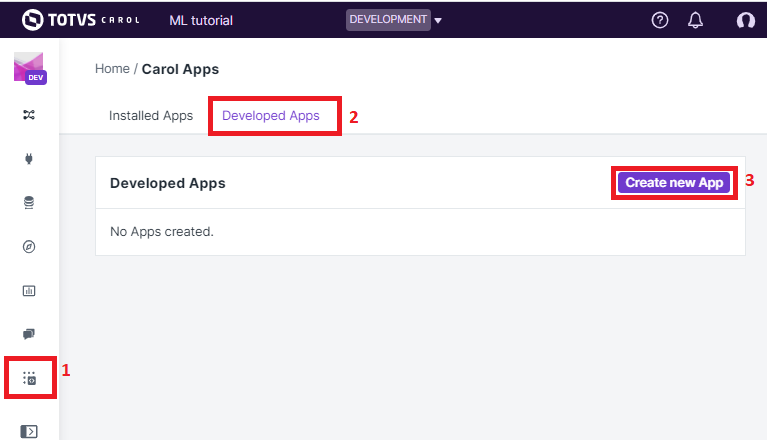
Figure 9: Creating an Carol App.
After clicking on Create a new App you will be prompted with a
couple of infos to be filled:
Label: The label which will be presented on the GUI.
Name: The internal identifier used along the environment.
Version: The release version for your app.
Description: A brief description of the purpose of the given App.
After filling the required info you can go on and click on the
Create App button. The page on figure 10 will be presented with
you App admin information. On this page you can start by revising the
platform URL for your app and its version (3).

Figure 10: App admin web page
On the tabs below (2) you have panels with information about your app.
On the Overview tab you can view a summary of your environment, the
Settings tab allows you to create parameters which can be read
during execution. In Files is where the build files are placed (more
details are covered later on the doc). The Installation tab helps
you deploy your app to other environments.
The last two tabs, Process and Logs, are the panels where you
can control the execution of your App and check for debug information.
On Process your can either make a single execution (or schedule
recurrent ones) for batch apps or you can start a server process for
online and web apps. The logs are always presented time ordered on the
Logs panel.
The section (1) on figure 10 is used for building and releasing your
code. This topic is covered in details on
https://docs.carol.ai/docs/carol-app-dev, but essentially the type of
App you are developing will be dependent on how you structure the files
on the Files panel on section (2), After building, Carol will
automatically reorganize your admin screen according to the App type:
batch, online or web.