3. Creating a data model
Besides storing the raw data into staging inside Carol, the platform
also offers a way to model and map the records to higher level schemas,
what is called a Model inside Carol. Models are helpful, for
example, when you have multiple data sources and want to map them all to
a single standard layout.
For our example, we wil be mapping the Boston House Prices dataset to a data model which enforces the data type, adds a human readable field label and brings a brief description on the columns we are working with.
To create the data model click on the Data Model icon on the left Panel,
then on Add a Data Model. After filling the required namings, click
on Confirm and Add (Figure 12).
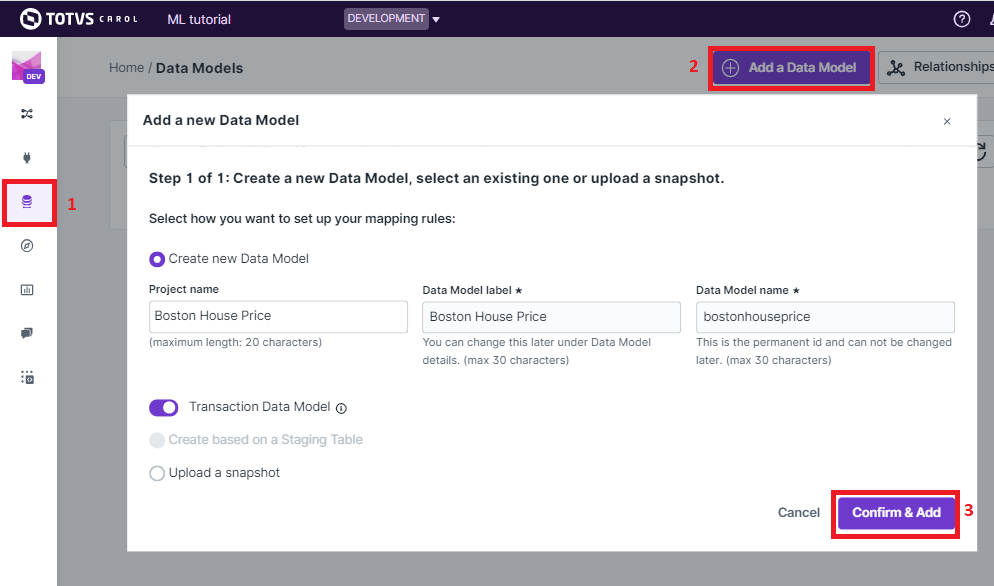
Figure 12: Adding a new data model
At first glance the data model will be empty. We can add the fields of
our dataset by clicking on the Add Field button. Even though there
are several out of the shelf attributes ready to be selected, on this
example we wil be creating new fields customized for this dataset, so
click on Create New button. Just add all the fields at once,
together with their data type and descriptions, and click on
Create new fields (figure 13).
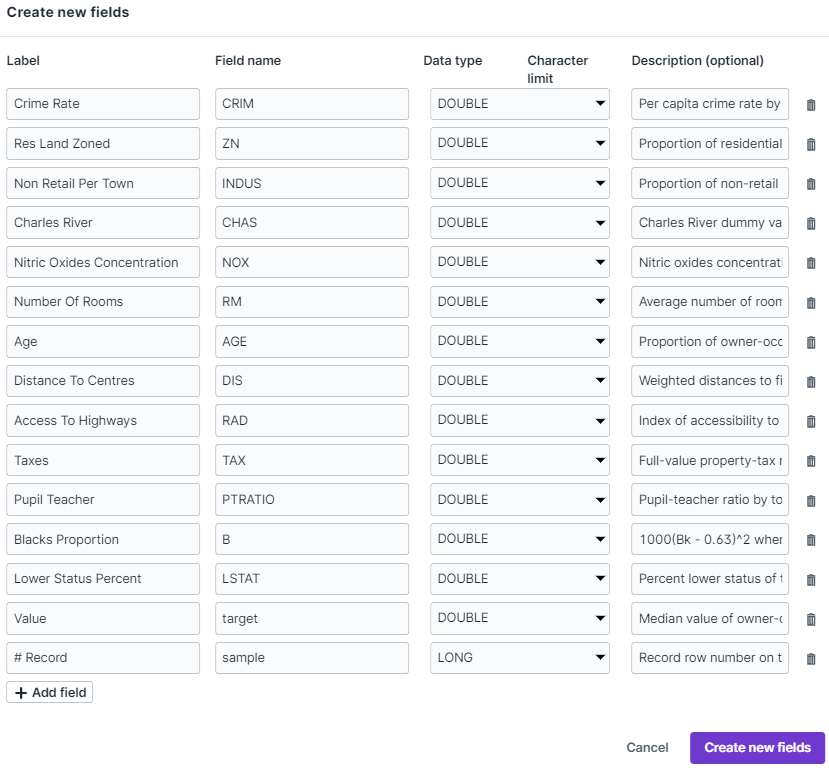
Figure 13: Creating all the fields at once.
If all went well on the model creation, you can go ahead and proceed with model publication, so that we can use the model to organize the raw data placed on the staging (figure 14).
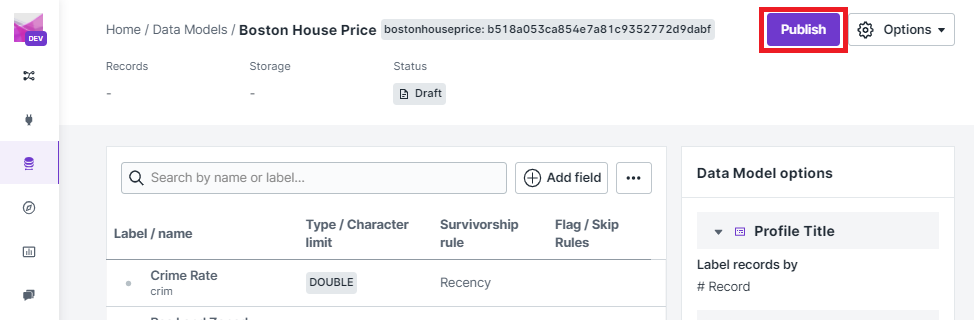
Figure 14: Publishing your data model
3.1. Mapping data from the staging to the model
So far our model and our staging are distinct entities inside
Carol. To complete our data flow we need to create a mapping rule in
order to the data to flow from the staging to the data model. There are
different ways of doing it, a straightforward one is by clicking on the
Connector icon in the left panel, then on the name of the source staging
and then on Map & Cleanse button (figure 15).
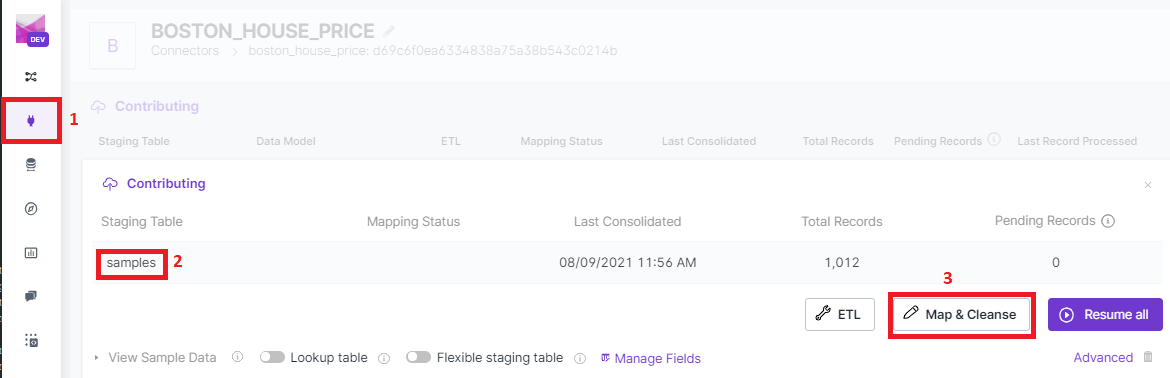
Figure 15: Adding a new mapping rule through the connector user interface.
The steps are very well guided by the wizard screens, where first you
need to select the previously defined data model (figure 16), then
select how the mapping rules will be provided (figure 17), and finally
confirming the creation through the Add Mapping Rules button.
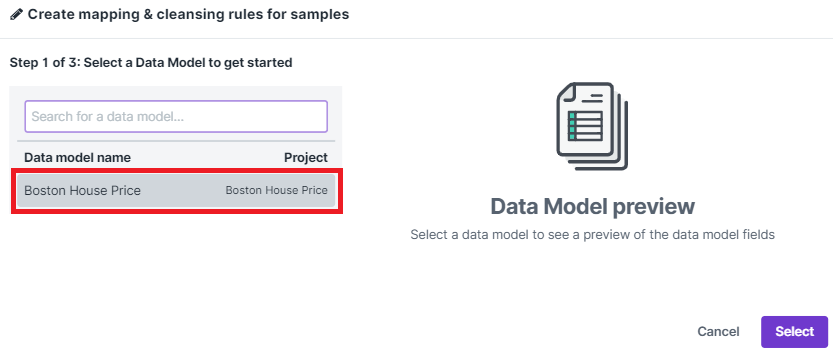
Figure 16: Choosing the already created Data Model.
If you have already a mapping linking the source staging fields to the
data model columns you can reuse it by selecting
Upload a set of mapping rules on the screen (figure 17). In this
case we will create it from scratch with the
Create a new set of mapping rules option.
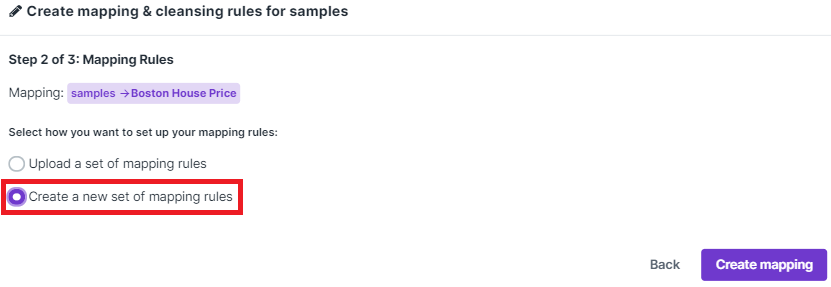
Figure 17: Choosing the mapping rules input type.
The mappings need to be added one by one, by clicking the Edit
button. The interface already splits the list of mapped and unmapped
fields to facilitate the linkage process (figure 18).
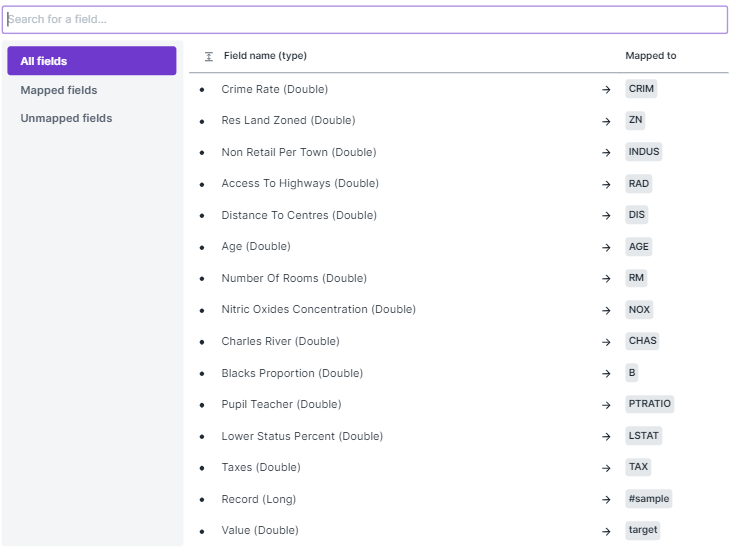
Figure 18: Linking the data model fields to the staging columns.
After the mapping is completed you can click on the Publish button
to start the data flow. Carol backend runs storage optimizations behind
the scenes to grant data consistency and fast access, you will be
notified that your request is being processed (small red bell on the top
right of the screen). This process usually takes from a few seconds to a
couple of minutes depending on the number of records/ columns on your
table.